Thursday, July 8, 2010

Cake-y Opportunities and Cake Walk in the Media!

I recently got wind of the new cake show TLC is doing with Buddy Valastro (The Cake Boss). Doesn't the network's description of the show make you want to apply RIGHT NOW?!

"Are you a natural born baker or artist? Can you make amazing masterpieces, crazy confections or over-the-top cakes? Could you be the next pastry guru?

If so, the producers of "Cake Boss" are currently casting outgoing and competitive up-and-coming bakers who want their big break with the help of the "Cake Boss" himself!

TLC and Buddy Valastro (The Cake Boss) are looking to launch the career of a promising cake decorator and baker on a new baking competition series. Break into this highly competitive culinary world with the help of Buddy and his team! Do you believe you have the skills and drive to graduate top of your class?

This new baking competition series, hosted by Buddy and team will feature weekly lessons, challenges, and eliminations. 10 hopeful contenders will vie for cash and prizes. No culinary experience required!"

I can seriously feel my adrenaline start pumping when I think about the competition. I SO want to be one of the chosen 10 contenders! I've already entered...just waiting to hear back! You should enter too! Go here to get more info.

And if you've ever baked anything in your life, you know how important good vanilla is. My friend Julie is giving away TWO bottles of her favorite Sonoma Syrup Co. Vanilla Bean Extract "Crush." At $20 a pop, that's a great giveaway! Head on over to her blog to enter (giveaway ends this Monday so hurry)!

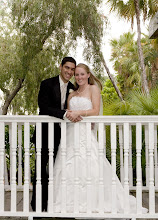
Ok, now on to the more selfish part of my post. Back in November, I made the wedding cake for my good friends Shelby and Ben. Shelby designed such a beautiful cake so I was honored to be the one to make it reality for their wedding at the Golf Club of Amelia Island. Anyway, she recently discovered that a photo of their wedding cake is featured on their website! Here's what it looks like and you can go to their site to see for yourself.

Exciting!

And, in May, I hosted a Drop In and Decorate party to create some fun cookies for the local Ronald McDonald House. Our cookies have now appeared on the Drop In and Decorate blog! Great work, girls!


Finally, just because tomorrow is FRIDAY, here's a video to make you laugh:


Wednesday, July 7, 2010

Navy & White Gardenia Wedding Cake

Some of the most difficult cakes to complete successfully are the ones with minimal decorations. I know you're probably thinking, "Huh? That doesn't make any sense! If there's no decorations, it should be easy."

Nope! The fewer the decorations, the fewer opportunities you have to cover "mistakes."

For example, this cake was simply covered in white fondant and had a navy blue ribbon wrapped around the base of each tier:


Even the tiniest wrinkle, dimple, or tear in the fondant would have been really evident. We put 4 hand-made gardenias on the cake, but that's it!


If you're out hiring a cake decorator for your wedding and you want to see what he/she is really capable of, ask to see a cake with little to no decorations. It'll showcase his/her skill with buttercream/fondant alone, which is important because it's one of the building blocks of a gorgeous cake!

And if you are a decorator trying to perfect your own buttercream/fondant skills, get a set of Styrofoam dummies and practice on them. That way, you won't have to eat tons and tons of cake. You can practice, peel it off, practice again, etc. Of course, you'll have to use more gentle hands with a real cake, but practicing on a dummy will at least give you the right techniques and get you more comfortable with the sugary medium.


While the cake itself didn't take a whole lot of time, the gardenias definitely did! They were created petal by petal, allowed to dry, and then assembled.


(The gardenias really are white but they look a little dingy due to the shadows that are sometimes cast in the bakery.)

Tuesday, July 6, 2010

Rock On! Guitar Graduation Cake

Graduation season is finally over, but I'm still getting caught up with posting all the graduation cakes we made this year. Here's one of my favorites:


The cake was iced in chocolate ganache (yum!) and then decorated with fondant accents. The guitar was pre-made out of gum paste to replicate Oliver's real guitar.


The graduation cap was also a cake with a fondant-covered cardboard mortar board.

I like this cake because it's fun, simple, and definitely masculine. Rock on, Oliver!

Thursday, July 1, 2010

Thomas the Tank Engine Birthday Cake

If you've ever watched the Ace of Cakes, you know that they often say "It's the week of [insert theme of choice]." You may think that's just a gimmick for television, but it's not! Cake orders come in trends for us too!

Two weeks ago, we did a cake for Thomas the Tank Engine. And, another - totally unrelated, I might add - customer requested the SAME cake last week! The only major difference was that the first customer wanted to put one of her child's toys on the cake instead of having us make Thomas out of sugar. So...here's Lucas' cake without Thomas (he was added when they got the cake home):


And here's Wyatt's cake with the sugar Thomas:


Wyatt's cake was made of 6- and 10-inch tiers so the ledge for Thomas to sit on was only about 2 inches. That means Thomas had to be even smaller because no one wants a train hanging precariously over the edge!


That tiny face and those chubby cheeks were tricky to hand-mold! But I'm happy with the finished product, and I love how the fence around the bottom tier came out!


What other themes have we had in our bakery? Polka dots (as evidenced by my last post), woodsy/garden cakes, butterflies, zebra print, etc! I'm sure you've seen a few of each of these on here already!

Tuesday, June 29, 2010

Sophisticated but Fun Polka Dot Cakes

I don't know if you're aware of this, but polka dots are very popular on cakes right now. Big ones, small ones, random ones, perfectly aligned ones...they're all "in."

And there are so many great things about polka dots cakes!

1. They're festive and fun!


2. Yet they are sophisticated at the same time.


2. They're ageless. We've done polka dot cakes for tiny tots, tweens, high school graduates, 40th birthday parties, and even for those who are just "young at heart."


4. They can be multicolored or monochromatic. And they can really add a "splash" of color to a cake!


5. They can be put on buttercream cakes for those of you have that strange fondant-phobia.


Do you love polka dots? Tell me why!

Monday, June 28, 2010

I Heart Faces: Pets

This week, the challenge over at I Heart Faces (www.iheartfaces.com) is Pets! Everyone knows how much we love our little booger Nani so I can't resist entering a photo.

I'm no photographer, but this photo makes me smile. The light coming through the window was soft and vintage-looking.

This was during one of our dog-sitting episodes with Bella. The puppies love each other and are pretty much never separated. Nani is always looking out the front window, and one morning I found Bella imitating her friend. Precious.

If you're a fellow pet-lover, be sure to look at all the other (400+ as I write this) entries this week!

New Blog Button From Button Connection by Tree

Recently, one of the blogs I follow (Simply Stacie) ran a series of giveaways for her Build a Better Blog Week. Surprisingly, I won one of them! I won a free custom blog button design from Tree at Button Connection by Tree.

Last October, I designed my own blog button with some free images I found online. Here it is:


Not too shabby for my first time, I suppose.

But check out Tree's creation:


How awesomely cute is that?!

So, if you have my button on your blog, please replace it with this adorable one (you can "grab" it off the left-hand side bar)! And definitely go check out Simply Stacie and the Button Connection by Tree.

Thanks, Tree!

Saturday, June 26, 2010

Jilly, the Zhu Zhu Pet, Cake

Some of our good friends moved to Georgia this week! Of course we wish them luck in their new home & jobs, but we'll definitely miss them. They're the ones that own those adorable guinea pigs that Nani befriended. So, in their honor, I'm posting a cake with a little creature on top.

Apparently, this birthday girl was a huge fan of the Zhu Zhu pets, and Jilly was her favorite. Normally, I'd say, "What the heck is a Zhu Zhu pet?" But this time, I decided to keep my mouth shut and just replicate the little bugger in sugar. So if you're curious, you're on your own!

First of all, here's the cake we created:


And this is Jilly:


A furry, pink & white hamster. For this cake, we decided to make her sitting up so that she'd be squashing the gift bow on top.


Jilly and the bow were made of gum paste.


The cake was iced in 2 shades of teal buttercream and decorated with brightly colored fondant accents.


So, coming full circle, this cake reminded me of the Nani's guinea pigs...cute little rodents. Guinea pigs are rodents, right? Anyway, good luck Matt & Nicole! You will be greatly missed in G-ville!

Thursday, June 24, 2010

Oriental Stringwork - Part 4

Wow, I can't believe it's been over a month since my last stringwork post! Phew! So without further ado, here we go!

If you need a quick review, help on icing consistency, etc., check out these other stringwork tutorials:
Basic Stringwork
Stringwork with a Bridge
Bridgelss Stringwork

I'm using the same cake dummy from the last few tutorials, so just ignore the extra stringwork designs you see in the photos.

Step 1: Initial Drop Strings


Begin by piping basic drop strings along the top edge of your cake. I'll just be doing 2 for this tutorial, but you can do them all the way around your cake if you want! Keep these drop strings relatively short in width and length - it'll be easier for you in the long run.

Step 2: Attach Sugar Pearls

Place a small dot of royal icing at the intersection points of the drop strings. Press a sugar pearl on each royal icing dot. Let these dry completely before continuing. (Sorry, no photos for this step, but you can see the pearls in the next step.)

Step 3: Flip the Cake Upside-Down


Yup, you heard me. Upside-down. Place the flipped cake on a riser of some sort - another Styrofoam cake dummy works really well. Of course if you're working on a Styrofoam dummy, just grab the sucker and flip it over. If it's real cake, you'll need to use more precaution.

To flip a real cake: Cover the cake in fondant, and allow it to harden (overnight is best). Place a piece of cardboard the same size as your cake on top of the cake. For example, if your cake is an 8-inch round, place an 8-inch round cardboard piece on top of the cake. Then carefully flip the cake over so that it's now resting on the 8-inch round cardboard piece.

Step 4: Pipe Inverted Strings


Just like you would on the side of the cake, pipe drop strings from pearl to pearl. You'll quickly realize that these strings break easily. That's why it's important that your original strings in Step 1 were short.


If you're having an overwhelming amount of string breakage, check your icing consistency. It could be too wet (is it really shiny?) or too dry (is it cracking?). Alternatively, your strings may also be too long, and you simply can't defy the laws of gravity.


However, don't be too disappointed with some breakage - that's normal! In fact, in some of these pictures, you'll see my string boneyard (all the broken strings that fall to the cake board).

Once you get the strings to stay in place, let them dry a few minutes before continuing. We'll be flipping the cake back over in the next step so your strings need to be dry enough to hold their shape when the cake is moved.

Step 5: Pipe Your Second Layer of Strings


Flip the cake over again so that its now in its original position. Pipe another set of drop strings from pearl to pearl.

Step 6: Add Pearls and Continue The String Layers


Just like before, "glue" sugar pearls at the string intersection points. Continue to flip and unflip the cake, adding more strings & pearls, until you have the desired dimensions & depth.

Today, I'll be stopping at 2 layers, but you get the point. Of course, the further you go out, the more fragile the set-up will be - but also the more impressive!


The key to creating gorgeous Oriental stringwork is to keep the strings within each layer the same shape and size. However, the shape and size may gradually increase or decrease as you add layers. For example, I started with larger strings and then got smaller as the strings moved away from the side of the cake.


That's an impressive cake profile, isn't it?!

Now, as a bonus, I'll share some more creative Oriental stringwork. I always say this, but think outside the box! Everyone does stringwork like the example shown above! But who said the strings have to be perfect half-circles or sit at the top edge of the cake?


Here, I started with some basic strings up against the side of the cake. Then I attached pearls at the intersection points.


I flipped the cake and piped more basic stringwork against the side of the cake. Note: this step would have been easier if I'd attached the pearls AFTER I'd piped the strings, but I don't always do things the easy way...

Then, after a series of flipping, unflipping, piping, and pearl gluing, I arrived at this finished product:


Have you ever seen THAT in a book? (Seriously, if you have, I'd love to see the book!)

So I can now say that I've shared with you everything I know, to date, about stringwork! People pay lots of money to take stringwork classes, and now you don't have to! If you make any stringwork cakes/sugar art pieces using my tutorials, please send me the photos at phdserts[at]gmail[dot]com. I would LOVE to see the photos and post them here, with permission.

What's next? I'm organizing for a very informative article about how to prepare for and win a cake decorating competition! Oh yea, more insider secrets! And I hope you'll use them at the Florida I.C.E.D. Cake Competition. Yup, that was a shameless plug. *wink*

Monday, June 21, 2010

Cake Walk Featured on Carnival of Shopping #15

Cake Walk was just featured in Issue #15 of Shopaholic's Carnival of Shopping series!


I'm just starting to delve into all this site has to offer, but they've got "how to" articles, great shopping finds, the latest trends in fashion, sports, & decorating, etc, etc, etc. There's so much there! Check out Issue #15 and Shopaholic.com!