Thursday, February 24, 2011

Panhandle Cake CRUMBS - LIVE 1-Tip Contest!

During the 2011 Panhandle Cake CRUMBS Competition, they have a couple of live mini-competitions to keep the crowds entertained. Susan, show chairman, asked me to participate in the 1-tip competition. The idea is that 3 different cake decorators are given all the supplies they need to decorate a cake - spatulas, icing, piping bags, colors, etc. - and only ONE decorating tip. The decorating tip is kept a mystery until just before the competition. So, you can pretty much expect to see some crazy tip that no one ever uses anymore!

Well, I'm a nerd at heart so I brought a few cake decorating books in the car with me. I was hoping to study up on some of the weird tips. I mean, we had a 5.5 hour drive to the competition so I might as well use my time wisely, right? Well, it didn't help because the tip we were given was not in any of my books! Bummer!

We were given tip 100:

...Ready? ...Set?...Go!


I started the competition by dropping one of my spatulas on the ground. Whoops! Luckily, they gave us a bunch so I didn't have to use the dirty one. Then I colored my icing yellow to add a pop of color to the cake.


I think this is about the time Susan (on the far right) asked me if I'd ever used that tip before. "No ma'am, never seen the dang thing in my life!"


After I got my cake iced, I colored the rest of my icing 5 different colors. I figured, I'll get the mixing overwith so all I have to do is decorate! Did I mention we had 30 minutes to complete our cakes? Yea, that's pretty fast. After I mixed all 5 colors, I realized we only had 3 piping bags.

Me: "Susan, are we only allowed to have 3 piping bags?"
Susan: "Yup!"
Me: "Fabulous!"

So I loaded 2 colors in one bag. If you look really closely in the picture below, you can see the pink on the bottom of the bag and the orange on the top. It created a pretty cool effect on the cake when I piped the border.


Then, I taped off half of the tip, loaded a bag with blue icing, and piped stringwork around the outsides. Now, of course, I did this part in about 5 minutes so it's not even or consistent. But I had to do stringwork - it's become sort of like my signature at competitions lately.

And you can't tell from any of the pictures Adam took, but I also piped flowers and polka dots on top of the cake. Oh, and the word "groovy" since it is a 1960s-themed cake competition!


Now to present our cakes to the audience!

Here's Rhonda Motley's (Did I get her name right? Oh, I'm so bad with names!):


Here's mine:


And here's Sandy Bishop's:


Of course, I have to mention that Rhonda and I are professional cake decorators and Sandy is not. But she had plenty of personality to make up for her lack of experience. *wink*

And the winner? Surprisingly enough, me! Susan said the judges (those people hovering in the background of the pictures above) chose the winner based on the creativity of using the tip, the overall design, and the relevance to the competition theme.

I'm sorry that we didn't get a better close-up of all the entries, but trust me when I say they were all great! So different and so creative!

Tuesday, February 22, 2011

Calphalon 7 Quart Digital Slow Cooker Review & Giveaway

I am a slow cooker addict. There, I said it. I'm not seeking an intervention, though. Instead, I want to convert you to a slow cooker lover if you're not one already!

I mean, what's better than coming home after a long day at work (and they're all long, aren't they?) and having dinner already cooked and smelling delicious?! I use my slow cooker almost every week for at least one meal, and then the following evening we have leftovers for dinner. So when Calphalon offered to let me try out their brand new 7 Quart Digital Slow Cooker and do a review, I was jumping up and down in my chair. And, best of all, they're going to give one away to a lucky reader! That's a $149.95 value! Aren't you excited?!?!

I'll get to the giveaway in a minute, but first I have to talk about the slow cooker itself. It's fabulous! The sleek stainless steel and black design would look good in just about any kitchen. My husband loves it because the crock fits easily in the sink for washing. And I haven't even told him it can go in the dishwasher! *evil laugh*

The digital display is so easy to operate. I usually read the instructions before I start using anything electronic...but this was just too easy. Just dump your food in, click a couple of things on the digital display, and head to work! It's got 4 mode settings - auto (cooks 2 hours on high and then the rest of the time on low), high, medium, and low, and it's equipped with Calphalon's exclusive Opti-Heat system that helps distribute heat so the food cooks evenly. The timer can be set for up to 24 hours - perfect for the best fall-off-the bone BBQ short ribs!

Since I use a slow cooker all the time, I wanted to try a new recipe for the review. Ever made a cake in a slow cooker? Sounds perfect, right? You have company coming over for dinner so you're bogged down with all the food preparations. Who has the time or effort to make an amazing dessert too? Ahhhhh, let the slow cooker do it! I made a Chocolate Peanut Butter Chip Cake using a recipe I found on about.com. I set the cake to bake while we ate dinner and it was ready shortly afterwards! Spoon a little vanilla ice cream on top of the warm, molten cake and drizzle some chocolate or caramel over the top...pure bliss...

And for a quality control test, I also made my favorite slow cooker pot roast dinner in the Calphalon 7 Quart Digital Slow Cooker. YUM! Perfection! And if you're curious, it's my favorite recipe because I just throw whatever I want into the crock and it's always delicious. Here's a list of what I add if I have it on hand:
1 boneless pot roast
1 chopped yellow onion
1 can diced tomatoes (undrained)
1 small can tomato paste
1 garlic clove, minced
1 can low sodium chicken broth
petite red potatoes, quartered
sliced carrots
pinch of dried rosemary, basil, oregano
1 bay leaf

I think that's it. But if I don't have something, it doesn't go in! No biggie! It's always yummy, and no one ever notices the missing ingredient.

And now on to the part you've been waiting for! The giveaway! Calphalon is giving away 1 7 Quart Digital Slow Cooker (US residents only, 18 years and older, please) to one of you! For a chance to win, visit Calphalon's website and leave a comment telling me what else you'd like to have in your kitchen. Note: This part is mandatory and must be completed before extra entries can be awarded.

Extra entries:
1 entry - Be a Cake Walk follower on Google Friend Connect (in the left sidebar).
1 entry - Subscribe to Cake Walk's RSS feed.
1 entry - Like Mel's Cake Walk on Facebook.
1 entry - Add the Cake Walk button to your blog.
1 entry - Follow @MelsCakeWalk on Twitter.
1 entry - Retweet the giveaway. (Use the Retweet button at the top of this post. You can do this 2 times/day; leave a comment here each time.)
3 entries - Make a post about this giveaway on your own blog. (Leave 3 comments here to get credit.)

Leave one comment per entry please. If you already do any of the above, please say so in a comment to get credit for the extra entry. This contest is open to adult US residents only. The giveaway will end Sunday, March 6, 2011 at midnight eastern time. Good luck!

*And after you've entered this giveaway, head over to thelittlekitchen.net to enter her Calphalon 2-Slot Toaster giveaway!

Monday, February 21, 2011

2011 Panhandle Cake CRUMBS Competition!

Well, you probably haven't noticed, but I've been pretty quiet on the blog for the past week. That's because I've been busy finishing my entry to the 2011 Panhandle Cake CRUMBS Competition. I entered last year's competition, fairy tale-themed, with Shrek's & Fiona's Wedding Cake. Here are a bunch of photos from last year's event if you're interested.

I don't want to overload you with photos so I'll just post photos of my entry today. Stay tuned for photos from the on-site 1-tip Decorating Contest and the other competition entries!

Here's the view of my entry from the front:

2011 panhandle cake crumbs competition 1960s melanie judge sweet 16
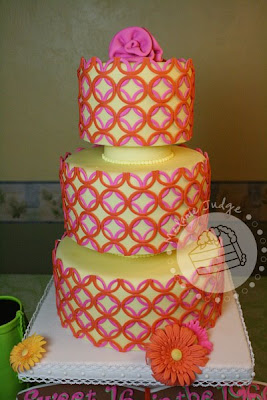
This year's theme was the 1960s so my cake was called "Sweet 16 in the 1960s." I tried to recreate edible versions of things you might find in a teenage girl's room in the 1960s.

And here's the back:

2011 panhandle cake crumbs competition 1960s melanie judge sweet 16
Of course, if it was a Sweet 16 cake, there had to be a birthday cake on it somewhere! Martha Stewart did a similar cake, and I like the mod look...so I adapted it: changed colors, added a few things, and here ya go:

2011 panhandle cake crumbs competition 1960s melanie judge sweet 16
And this particular 16-year-old has a scrapbook turned to a page showing her boyfriend Mark and her best friends at the drive-in, the skating rink, and the science fair. I found all these photos in one of Adam's uncle's high school yearbooks from the 1960s. Treasures!

2011 panhandle cake crumbs competition 1960s melanie judge sweet 16 photofrost edible images
This is my absolute favorite part of the cake - the lime green go-go boot made entirely of Rice Krispies Treats! I love how the pom poms came out! Wanna know a secret? I only made the pom poms to cover boo-boos on the boot! I didn't have the pom poms in my original cake sketch, but I'm happy with how they look. They add a little fun & flirtatiousness to the boot!

2011 panhandle cake crumbs competition 1960s melanie judge sweet 16
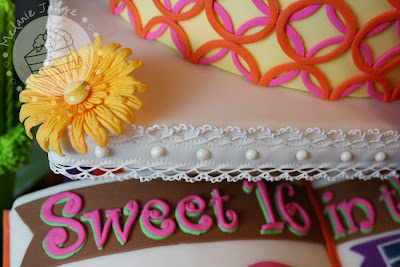
I built the cake stand for the birthday cake out of foam board and Rice Krispies Treats. Of course, I could have used a store-bought cake stand, but you don't get points for purchased and non-edible items. To decorate the sides of the cake stand, I use a fondant crimper and piped both traditional and Oriental stringwork.

2011 panhandle cake crumbs competition 1960s melanie judge sweet 16
And, on the back of the cake, I had an orange phone made of Rice Krispies Treats, and I propped up 2 record albums - The Beatles' Yellow Submarine and Pink Floyd's Dark Side of the Moon. Now, if you're a Floyd fan, you know that Dark Side of the Moon was actually released in the 1970s. Ooops! I didn't realize that until after I'd made the album cover, and it came out so awesome I just had to use it! Luckily, the judges didn't seem to notice. *wink*

2011 panhandle cake crumbs competition 1960s melanie judge sweet 16
So did I win anything? Well, that's the exciting part, isn't it!?

2011 panhandle cake crumbs competition 1960s melanie judge sweet 16
I won 1st Place in the Professional Division, Best of Show, and Decorator's Favorite.

2011 panhandle cake crumbs competition 1960s melanie judge sweet 16
And here's a photo of the massive cake, me, Lew Churnick (owner of PhotoFrost), and Lisa Menz. I used PhotoFrost images to make the scrapbook and LOVE their product! Lisa has a PhotoFrost printer so after I scanned the images and edited them a little, she printed them off on the icing sheets. Thank you, Lew and Lisa!

2011 panhandle cake crumbs competition 1960s melanie judge sweet 16 photofrost edible images
You can be sure that when I get my bakery going in Tampa, one of the first pieces of decorating equipment I'll purchase is a PhotoFrost printing system!

Thursday, February 10, 2011

Wedding Cake with Bride's Custom-Made Flowers

Here's a gorgeous and interesting cake I did a few weeks ago:

buttercream wedding cake gum paste flowers with rhinestones pink purple
The cake was iced in buttercream. The flowers & leaves were all made of gum paste and the brown swirl piping was done in chocolate buttercream.

buttercream wedding cake gum paste flowers with rhinestones pink purple
The bride purchased the rhinestone centers for the flowers and asked us to build the flower petals around them.

buttercream wedding cake gum paste flowers with rhinestones pink purple
So I made hot pink 5-petal blossoms for the larger jewels and purple stephanotis-like flowers for the smaller jewels. I love how they came out! Bright with color...and just a little touch of sparkle!

buttercream wedding cake gum paste flowers with rhinestones pink purple

Wednesday, February 9, 2011

Gator Color Flow Cake

This is a giant groom's cake I did a few weeks ago. The oval-shaped cake was covered with blue fondant. Then, the UF Gators logo was piped right on top of the cake in royal icing and flooded with thinned down royal icing.

It's the same way you would decorate a cookie, but this was much, much bigger!

uf gators grooms cake
At the wedding reception, the bride had set up a little shrine thingy for the groom's cake with pictures of them at UF football games, a cheerleader's pom-pom, and orange & blue rose petals!

uf gators grooms cake

Monday, February 7, 2011

The Very Hungry Caterpillar Cookies

By far, the cake I get the most comments and emails about is the Very Hungry Caterpillar 1st Birthday cake I made shortly after I began working for Ms Debbie's Sugar Art. So, I decided to make some cookies to go along with the cake!

very hungry caterpillar cookie
I used an watermelon cutter I found among Debbie's many, many cookie cutters. Here's a similar one from Sugar Daddy's Cake Design.

very hungry caterpillar cookie
And my favorite part of the cookies are the little fuzzies all up and down his back!

Thursday, February 3, 2011

Super Bowl XLV

The Super Bowl is this Sunday! Are you excited?! I'm not...not about the football part at least. I'm more excited that all my shows will be starting up again - Survivor, Grey's Anatomy, Desperate Housewives, etc.

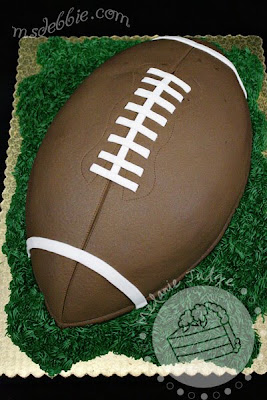
But here is a football groom's cake I did a couple of weeks ago. I thought I'd post it in honor of the upcoming super bowl.

football grooms cakefootball grooms cake

Wednesday, February 2, 2011

We're Having a Baby!

Well the news is out! We've called all our friends & family and even announced it on Facebook. Announcing it on Facebook was a little intimidating for me...once you say anything, EVERYONE knows! That's a little scary!

So, it's only fair to announce it here too...I'm pregnant! My husband and I have been trying to conceive for 15 months so the fact that there is a baby (currently the size of a blueberry, according to what I've read) growing inside me is a bit surreal. And since we'd been trying so long, we had to come up with a creative way to break the news to our immediate families!

I made cookies in the shape of onesies using this cutter & texture mat set from Country Kitchen Sweet Art. On each cookie, I hand-painted a special message for each family member.

These are the cookies for my Dad, Mom, and sister:

baby announcement cookies onesies
And these are the ones we gave to my in-laws:

baby announcement cookies onesies
And, of course, I made a little surprise for the Daddy-t0-be:

baby announcement cookies onesies
The doctor said I'm actually due Sept 22nd, but I was close! How did you break the news to your family and friends? I'd love to hear about it!

Tuesday, February 1, 2011

Fondant 101

It's time for a new tutorial! Today, instead of showing you how to do a specific project, we're going to talk about fondant.

What the heck is fondant, anyway?

Well, I like to think of it as edible play dough. Pretty much anything you can do with play dough, you can do with fondant!

You can purchase pre-made, ready-to-use fondant from a variety of sources:
Wilton
Satin Ice
Fondarific
FondX
Choco-Pan (actually an alternative to rolled fondant and made with white chocolate)

Or make your own from scratch:
Rolled Fondant Recipe
Rolled Marshmallow Fondant Recipe

The first think you need to know is fondant dries out quickly so you need to store it wrapped tightly in plastic wrap. I like to wrap mine in plastic wrap and then put it in a zip-top bag for extra protection against air exposure.

what is fondant tutorial
Working with fondant is very hands-on so you MUST wash your hands before you begin! Also, be careful what you wear. Any lint or hair particle on your shirt will show up in your fondant as you work. For this reason, knit tops and dark colors are usually avoided. Or just wear an apron!

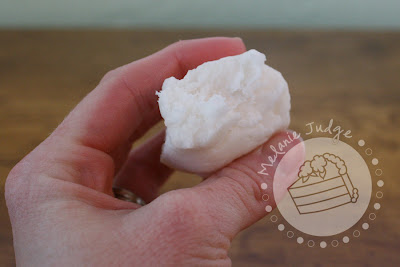
When you first open your fondant, it won't have much elasticity. If you pull the fondant in opposite directions, it will just break as shown in the pictures below.

what is fondant tutorial
So you have to knead it for a while until it become stretchy and elastic.

what is fondant tutorial
Now, you're ready to work with it!

You can do so many things with fondant, including but not limited to:
Cover Cakes with Fondant
Decorate Cookies
Add Fondant Accents/Cut-Outs to Buttercream or Fondant Cakes
Make Fondant Bows
Make Fondant Pleats

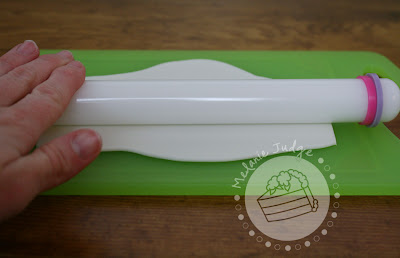
For many of these applications, you'll need to roll the fondant out to a thin sheet. If you're just beginning, you may want to use Wilton's rolling pins with guide rings. On the rolling pin pictured below, the purple rings allow you to roll your fondant to 1/8 of an inch thick and the pink rings let you go all the way to 1/16 of an inch thick. Using these guide rings helps you get an even thickness throughout your fondant sheet and ensures that you get the thickness you're aiming for.

what is fondant tutorial
Before I begin rolling the fondant, I always "smoosh" it with my hand. Just flatten it a little so it's easier to roll.

what is fondant tutorial
Then start rolling! Roll from the center of the fondant outward. When you reach the end, go back to the center and roll the other way. Keep rolling until the fondant is so thin that the rolling pin is just gliding over the surface of the fondant. That means your guide rings have worked and you've rolled to the right thickness!

what is fondant tutorial
And now you have a sheet of freshly rolled fondant to use for whatever your little heart desires!

what is fondant tutorial