Friday, February 26, 2010

2010 Central Florida Fair

Last year, I had such a great experience participating in the Central Florida Fair Confectionery Arts Competition so I had to enter again this year. For a recap on last year's fair, check here and here. This time, though, I entered 7 different categories in the professional division!

My "holiday cake" entry was 4 tiers, with the top 3 tiers being round and the bottom tier being square. I decorated the top 3 tiers with damask piping. First, I drew the pattern I wanted to use on paper. Then, I used graphite paper (it's non-toxic) to transfer the pattern onto the sides of my fondant-covered cakes. And the piping was all done with brown royal icing. The bottom tier was decorated with simple brown fondant stripes. And the big green bow was created out of a fondant/gum paste mix.


UPDATE: This cake won 3rd Place in the Professional Adult Holiday/Special Occasion Cakes category.


My second entry was in the "miscellaneous cakes" category. It was a 3-tier cake covered in teal and brown fondant. The top tier was decorated with really simple royal icing Swiss dots. The second tier was decorated with white polka dots (cut using the back of a decorating tip) and a blue ribbon. And the last tier was decorated with brown and teal stripes. I really enjoyed making this one because it's so playful! In fact, on the fair entry form, I described this cake as "fun & flirty."


UPDATE: This cake won 1st place in the Adult Professional Misc. Cakes category.

Here is my entry for the "3-tier wedding cakes":

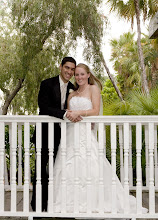
It's supposed to resemble a bride's dress and it was decorated only using ivory fondant! This cake was so easy to make so I'll do a tutorial of it for you soon. You'd be surprised at how few tools are needed to complete it!


UPDATE: This cake won 1st Place in the Professional Adult 3-Tier Wedding Cakes category.

I also brought the Shrek cake from last weekend's Panhandle Cake C.R.U.M.B.S. Fairy Tale Cake Decorating Competition and entered it into the "4 tiers or more wedding cake" category!


UPDATE: This cake won 2nd Place in the Professional Adult 4+ Tier Wedding Cakes category.


And remember the gum paste flower bouquet I brought to the 2009 ICES Convention in Illinois? Well, I brought those along too.

UPDATE: No ribbons for this entry in the Professional Adult Specimen Flower category.

When I registered for the fair competition, I had great ambitions for creating some adorable decorated sugar cookies. But time just got away from me so I created this to go along with the fair's theme this year of "Lights, Camera, Action!" It's nothing special...but who knows, it may still win a ribbon!


UPDATE: This cake won 1st Place in the Professional Adult Decorated Cookies category.


And my last entry was homemade chocolate chip cookies. I don't have much hopes for getting a ribbon for those after seeing the other cookies that were entered into the competition. Yes, chocolate chip cookies are a classic, but can they really stand up to snickerdoodles, peanut butter drops, chocolate-chocolate chip cookies, etc? We'll see!

UPDATE: This cake won 3rd Place in the Chocolate Chip Cookies category.

So my car was packed to the roof with the fair entries. I have a little car...a Toyota Celica like this one:


Of course, this one isn't mine...mine needs a new paint job and window tinting...but it's a cool photo, isn't it?

The great thing about the Celica is that the back seats fold down and make a GIANT trunk! I was able to fit all of these entries AND an entry for a student of mine. She created an all-buttercream cake for the fair's theme. Look how great it turned out:


UPDATE: Jessica's cake won 2nd Place in the Adult Amateur Theme Cake category.


In early March, I'm heading back to the fair to pick up the entries. Then I'll post some winners and my favorite cakes here for you all to see!

Tuesday, February 23, 2010

2010 Panhandle Cake C.R.U.M.B.S. Competition

As I promised, here are a lot more photos from this past weekend's 2010 Panhandle Cake C.R.U.M.B.S. Cake Decorating Competition. The theme this year was fairy tales so it was fun seeing all the stories represented in sugar!


In addition to the cake decorating competition, they had:
  • a bake sale to benefit the Ronald McDonald House
  • a kid's cookie decorating table (see photo below)
  • a one-tip decorating contest
  • various demonstrations
  • a cake tasting competition
  • and a demonstration by Linda McClure on how to use the Cricut machine to decorate cakes!

Oh yea, now that's a fun, yummy-looking cookie!

To get this photo, I sneaked up behind 3 of the judges as they began to inspect the first cake in the Adult Professional Division.

And now on to the main event! Here are the winners of each category:

Children's Division:
1st place - Kendal Motley; Tinkerbell
2nd place - Natalya Bragg; Cinderella
3rd place - Michael Posey; The Little Mermaid


Youth Division:
1st place - Ashley Woods; Rapunzel
2nd place - Bailey Motley; The Little Mermaid
3rd place - Megan Crooke; The Princess & the Pea
4th place - Roselynn Mack; Sleeping Beauty


Adult Novice Division:
1st place - Debra Fallo; Cinderella
2nd place - Christine Gaston; Rapunzel
3rd place - Lydia Farmer; The Three Little Pigs


Adult Advanced Division:
1st place - Kathy Spalding; The Old Woman in the Shoe*
2nd place - Rhonda Pulley; The Princess & the Pea


Adult Professional Division:
1st place - Melanie Judge; Shrek**
2nd place - Shanon Motley; A Fisherman's Fairytale***
3rd place - Michele Swann; The Bee & the Orange Tree


This Sleeping Beauty was one of my favorites! Perhaps it's because Aurora is my favorite Disney Princess...but most likely it's because Sharon did such an amazing job on the cake!


And here's another of my favorites from the show. Margaret Stutsman made this gorgeous Alice in Wonderland cake. The color was absolutely perfect, don't you think?! But it was the small details, like the ornate key, the cupcakes, and the teapots, that really won me over.

The amazing members of the Panhandle Cake C.R.U.M.B.S. are already planning next year's competition. And the theme? The 60s!


To see more photos, check the following sites:
*Unfortunately, I didn't manage to get a photo of the front of Kathy's Shoe cake. However, don't you love the little buttocks showing in the top window?! Too cute!
**Hey, that's me! I also won People's Choice and Best of Show!
***And Shanon also won Decorator's Favorite!

National Pancake Day - Free Pancakes!


Straight from IHOP's website:

Flip for Free Pancakes!

February 23, 2010

Join IHOP to celebrate National Pancake Day on Tuesday, February 23, 2010. From 7 a.m. to 10 p.m., we'll give you one free short stack (three) of our famous buttermilk pancakes.* All we ask is that you consider making a donation to support local children's hospitals through Children's Miracle Network, or other local charities.

http://www.ihoppancakeday.com/

Monday, February 22, 2010

Fairytale Cake Decorating Competition

Last weekend, Adam & I drove to Pensacola so I could enter a cake into the Panhandle Cake C.R.U.M.B.S. 2010 Fairytale Cake Decorating Competition. It was a tough decision to choose a fairytale on which to base my cake design. I really wanted to do an Alice in Wonderland cake but figured lots of people would do that, especially with the new movie coming out soon. Then, I thought about doing a 7-tier cake for Snow White where each tier abstractly represented one of the Seven Dwarfs. But...how do you abstractly represent Sneezey without a bunch of tissues or green goo...just not very appetizing...

So I finally decided to do Shrek & Fiona's wedding cake! Fiona's half of the cake would be a very traditional wedding cake with soft green accents. And Shrek's half would be very "swampy" with lots of bugs and creepy crawlies.


Fiona's side:


Fiona's side was topped with roses - always a classic wedding flower. On the first tier, I used a lace mold purchased from CalJava and added the Shrek "S" with royal icing.

On the second tier, I used a different lace mold to create the pleating you sometimes see on a wedding dress. The buttons were made by pushing green fondant into a large JEM Cutters Daisy Center Stamp.


The third tier is my favorite because it has string work and extension work. Along the top and on the sides, you see Oriental Stringwork, which is basically strings that curve upward and downward. I just learned this technique from Geraldine Randelsome at the 2010 FL ICES MiniClasses so it was perfect timing! In the center of the tier, you see standard bridgeless string work. I promise, I'll post tutorials on all kinds of extension work soon. I love it! If you ever plan to enter a cake decorating competition, plan some string work and extension work into your design. These techniques are highly regarded as a difficult thing to master, but it just takes patience and perfect icing. I can't wait to show you how easy it really is!

The fourth tier was decorated with quilting. This is a VERY simple technique, especially if you have a quilting tool like this one. However, I am picky about what I spend my money on, so I create my quilting with a ruler. This is such a popular look right now so I had to include it.

And the 5th tier was decorated with lace drapes. Again, I created the lace pieces with a lace mold and just draped it across the top of the cake. It's an easy technique but looks so nice!

And now for Shrek's side:


I topped Shrek's side of the cake with onions. If you're asking yourself, "why would she do that?" you need to go watch the first movie again! Ogres are like onions - lots of layers!

On this side of the cake, I wanted to recreate techniques cake decorators use...but with bugs! A "snail/bead border" is one of the first things you learn as a cake decorator so, naturally, I made sugar snails for Shrek's side. I also used similar lace drapery except I browned this lace and tore it. Between each lace drape is a brown moth. The moths were Adam's idea - love it!

Another technique that's really popular on wedding cakes is swirly piping so I swamped it up a bit by making the swirls earthworms. These were fun to make, and someone actually approached me at the competition to ask if I had experience with earthworms since they were so detailed. Actually, I do! I'm a scientist, remember? I've dissected quite a few earthworms in my time. Hey, you can't say I'm not using my degree.


On the 3rd & 5th tiers I did some more draping - only because I couldn't think of anything else to do!

And on the 4th tier, I did some quilting. But this time, instead of pearls at the line intersections, I made little black beetles. Yes, the beetles have 6 legs because they are in Class Insecta. Ah, see? There's that science again!

After dropping off my entry at the competition, Adam & I went to get some chow. Mikkel recommended Peg Leg Pete's so that's where we went!


Then we headed back to the competition for the cake tasting competition and awards ceremony.
I was absolutely shocked and honored to find out that I won 3 medals: 1st Place Professional Division, People's Favorite, and Best of Show. Yowza! (That's my new favorite word. It's fun!)

Adam had the camera and between the less than optimal lighting and my speedy movements, he couldn't get a single clear shot. So...maybe if you squint at the screen, it'll look clear...


In order to receive the medals, I had to walk up a small flight of steps. We all know that's reason to panic! I'm naturally clumsy and it only gets worse with so many eyes on me. So I was really concentrating on getting up the steps, getting the medal, and getting back down the steps safely. Finally, Susan (Competition Chair and the one with the microphone) grabbed me and made me stand still for a photo. Oops!


And after it was all said and done, Adam made me pose with the cake and the medals:


Miraculously, the cake made it to and from Pensacola (690 miles and 11+ hours in the car) without a scratch! I didn't plan very well because we had only a half-inch clearance between the cake and the roof of the car. And loading the cake into the car required me to climb in and out through the trunk. Anyway, now it's sitting at the Central Florida Fair. I'll post more photos from both the competition and the fair soon...

So that's it! End of story.

What'd you say? You want to know more about the cake tasting? Oh...you had to ask, didn't you?

Well, there were 5 entries into the tasting portion of the competition. I brought a basic white cake with a layer of fudge filling and a layer of raspberry cream filling. Two of the other entries were pumpkin cake with caramel icing (by Rhonda Pulley and won 1st place) and a chocolate-covered cherry cake (by Sharon Posey and won 2nd place)! Then, there was a tie for 3rd! As soon as I heard that, I said to Adam "Wow, I'm going to be that one who doesn't medal." And sure enough...I was the ONLY one who didn't win a medal in the tasting competition. Was my cake flavor not gourmet enough? Or did my cake just take awful? Hm... Well, now I know what to work on for next year's competition!

In any event, I really enjoyed my day in Pensacola. I think at some point during the day, every member of the Cake C.R.U.M.B.S. club came over to talk to me for a minute. They were all so sweet and welcoming! I'm already looking forward to next year's competition, and I'm hoping some of my fellow central and south Floridians will join me!

Sunday, February 21, 2010

SkinMD Giveaway Winner!

And the winner is...

Angie Lilly, who in comment #47 (chosen using random.org), said:
I love cheesecake!!! I especially love the seasonal cheesecakes like pumpkin!
Congrats, Angie, and thank you all for entering!

Wednesday, February 17, 2010

Running on Cake

Last Friday, I did my first official cake for Ms Debbie's Sugar Art! She hired me to decorate cakes back in January, but because of the number of cakes on order, she said she probably wouldn't need me until the end of February. However, a friend of mine ordered a cake last weekend and requested that I be the decorator!

I was so excited to make this cake because...
1. It was my first cake for Ms Debbie!
2. It was for a friend!
3. It was going to be a carved running shoe. Running! Yay!
4. Wait, a carved shoe? Yikes...sounds tricky...but I love a challenge!

I started out with a rectangle of cake (torted and filled, of course) and began carving away a little at a time. Luckily, I was wearing my own running shoes that day so I kept looking down at my feet to get the shape right. In about an hour, I had a shoe shape. Then, I spent the next 5 hours decorating it! Yea, that's a ridiculous amount of time. But I really wanted my first cake for Ms Debbie to look good, you know!?

Anyway, I'm thrilled with how it came out:


Happy Birthday, Jeannette!

*Don't forget to enter the Skin MD Natural Shielding Lotion giveaway here.
**And check out this giveaway on The Little Kitchen Blog for a copy of the Best of America's Test Kitchen magazine and a KitchenAid rubber spatula!

Sunday, February 14, 2010

Skin MD Review & Giveaway!

At the end of January, Cat Doss emailed me and offered to send me a 4 oz bottle of her company's Skin MD Natural Shielding Lotion to review. I used the lotion religiously last week so I could give the most honest and informative review possible.


The concept behind Skin MD Natural Shielding Lotion is that, unlike regular lotions that just moisturize the top of your skin, Skin MD penetrates into deeper skin layers and helps it to naturally moisturize and heal. Chronic use of topical lotions can "fool" your skin into thinking it's moisturized so it no longer releases its own natural oils. In essence, your skin can become dependent on the lotions for hydration. However, Skin MD works to restore the skin's natural abilities to moisturize while protecting it from toxins and irritants that can cause further dryness.

The company claims that Skin MD is
Made in the US using high quality natural ingredients, making it over 90% all natural. All ingredients are considered to be of food grade and are also on the FDA's most safe list. It is free of harmful fragrances, parabens, and colorants making it hypoallergenic. We don't participate in animal testing nor does the lotion contain any animal products. Our lotion is also vegan-friendly and gluten-free.
Wow! It sounds like a perfect lotion, right?! I had to try it!

I'm always baking and washing my hands so they're perpetually dry. I began applying the shielding lotion to my hands every 2 hours or so for the first day (that's what the bottle advises until the skin's moisture level improves). Gradually, I began to use it less and less. I'm still using it a few times a day, but my hands don't feel nearly as dry as they used to. In fact, I seem to be blessed with unusually dry cuticles, and the lotion has made them look 100% better! I've always been embarrassed by the state of my cuticles so I am thrilled with this lotion for that fact alone!

I also have dry facial skin - my nose is almost always peeling. I was hesitant to put Skin MD on my nose at first because I have very sensitive skin. I started with a small dab of lotion on my nose before bed one night. When I woke up, there was no irritation so I continued to lotion my nose morning and night. I am happy to announce today that my nose is not peeling at all! Yay!

Want more information about the product itself? This is probably unlike any other lotion you've used. It's not thick and greasy. It's thin and milk-colored. Just a dime-sized dollop is enough to fully moisturize both hands. I was really impressed with how quickly it evaporated and left absolutely no greasy residue! And it really is fragrance free! Adam has bad allergies so I'm always careful what products and scents I use. I can use this lotion with confidence that it won't make him sneeze! And, this lotion won't clash with other body sprays or fragrances I already purchase (don't you just hate when they clash??).

Ok, so let's recap. Reasons I love this lotion:
  • My face and hands seem to be gradually getting softer and more moisturized.
  • It does not cause irritation.
  • It really is fragrance-free!
  • There's no greasy residue.
  • It absorbs quickly.
  • A little goes a long way.
  • Some bottles have 15 SPF (not the one I reviewed though).
Reasons I might not use this for every dry-skin situation:
  • The price - the website says it's available at my local Publix for about $20. That's reasonable, but a teeny bit high...
  • It's not a quick-fix. If I happen to become a hand model tomorrow, this lotion will not get my hands camera-ready in time. And, if a friend asks if you have lotion and you loan some to her, she will probably not be impressed. I did not see miraculous results after the first use alone. However, if I'm consistent about using this lotion, my skin will be healthier and younger-looking in the long run.
For even more information, check out the Skin MD Natural website. They have more customer reviews, doctor reviews, product information, an ingredients list, etc. You can even request a free sample!

But what's even better is Cat has offered to give one 4 oz bottle of Skin MD Natural to one of you lucky ducks! To enter the giveaway, leave a comment here and tell me what your favorite dessert is. I know it has nothing to do with lotion, but I bake so I want to know!

Extra entries:
1 entry - Be a Cake Walk follower.
1 entry - Subscribe to Cake Walk's RSS feed.
1 entry - Add the Cake Walk button to your blog.
3 entries - Make a post about this giveaway on your own blog/twitter account/facebook/etc.

Leave one comment per entry please. As always, make sure you either include your email address with your comment or post it in your profile so I can contact you if you win. The giveaway (open to US and Canada residents only) will end Friday, February 19th at midnight eastern time. Good luck!

Thursday, February 11, 2010

Ignitermedia.com

My Grandma sent me the link to this video on YouTube called 99 Balloons. I have to warn you, it's a tear-jerker. But it's so sweet, and I think it's the purest expression of love I've seen in a long time. In honor of Valentine's Day, I share it with you:


And to dry up those tears, here are a couple of funny videos also from Ignitermedia.com:


Monday, February 8, 2010

Our Little Chiquita Girl

Last weekend, Adam and I shared a banana for breakfast (with some King Cake...yummy!). For reasons I can't explain, I decided to stick the Chiquita banana sticker on Nani's head. Amazingly...and hilariously, she had no clue it was there!

I just kept thinking...you know when you try to put a gift bow on someone's head at Christmas or a birthday party? And you hope with all your might that they won't see it and will walk around with it smack on the top of their head for at least a few minutes?! Ok...I know I can't be the only one who used to do that as a kid...right?

Whatever, this time she didn't know it was there and it was SO funny. But maybe you just had to be there.

To make it even funnier, I moved the sticker to her forehead. And to top it all off, we decided to just leave it and see how long it stayed there! Unbelievably, it lasted 6 hours. Yes, 6! That's when Adam said I was being mean and made me take it off. Every party has a pooper...

But, in the meantime, the sticker had survived multiple naps, playtime, and a short walk outside! Here are a few photos I took of our little Chiquita Girl:

Ok, I know what you're thinking. "She's so darn cute! And Adam was right - that's mean to leave that sticker on her head for hours."

And my response? Well...yea, she's cute. But she's also a real booger sometimes! This was just a little payback for those countless hours when she plays with all of her squeaking toys! Muahahaha.

Sunday, February 7, 2010

Two Polka Dot Cakes

A few weeks ago, I had the opportunity to make two 2-tier cakes with polka dots! I love decorating with polka dots because A) it's such a clean, fun design and B) it's super easy to do.

The first one was made up of 6- and 10-inch round tiers covered in white fondant. The cake was covered with black polka dots and decorated with a big pink bow on top, a pink gift tag, and pink numbers.


The second one was a little more fun to make. Again, it was made up of 6- and 10-inch round tiers. This time, the polka dots were multicolored! I like it better already! This cake was for a Venetian masquerade-themed birthday party so I made a gum paste mask for the top and hand-painted it with gold luster dust. After I had added the mask and gift tag, I felt like the cake still needed something...so I made some ruby red roses and edged the petals with gold luster dust. Now, it's ready for the party!

Thursday, February 4, 2010

Florida ICES Mini Classes!

A few weeks ago, I was lucky enough to attend the Florida International Cake Exploration Societe (ICES) Mini Classes! I say lucky because I was only able to afford the registration and tuition because I won a scholarship from the national ICES chapter this summer. As a side note, if you are an ICES member, apply for the national and state scholarships! From what I hear, very few people apply so you have an excellent chance of winning.


I took two classes from Ruth Rickey about different edible painting methods. In the first class, we learned oil painting and water painting techniques on fondant. But, I really liked the pen & ink drawing we did! There's something about the pureness and simplicity of the black & white dots & lines that appeals to me.

In Ruth's second class, we played with cocoa butter! Again, I really like the puppy dog painting because it's just as series of dots and lines with brown cocoa butter. Then she gave us some colored cocoa butter...and the painting looks a lot like a water color to me. The last one we did was a silhouette. First, we brushed the fondant plaque with colored petal dusts. Then, we used black food coloring to paint the scene on top. Doesn't it look a little spooky? I love that one!

I had a little free time at the end of the class so I quickly painted a border and wrote "Happy Birthday" with colored cocoa butter on a chocolate fondant plaque. It was Adam's birthday that week so that's the reason behind the message, but I love how the colors really pop on the chocolate fondant!

This is a photo of Ruth and me after class. I adore her chef coats. She wears a new one every day, and they're all stylish, colorful, and fun. She custom orders them from Crooked Brook - too pricey for me right now, but definitely something to keep in mind for the future! I've been experimenting with sewing my own aprons lately...maybe I'll attempt a chef coat next.

Ruth and I also got to talk about half marathons. She walks lots of half marathons every year as part of the Team in Training, which raises money for the Leukemia & Lymphoma Society. I tried to sign up for Team in Training for the Disney Princess Half Marathon...but no one is returning my emails...so maybe I'll do it for my next half marathon!

Quick running update: For those of you just joining us, I (and a few friends) am training for the Disney Princess Half Marathon in early March 2010. Training was going absolutely swimmingly...and then it was suddenly halted when I started experiencing sharp pains in my left knee. I went to the orthopedic specialist last week. He diagnosed me with patella tendinitis and sent me to physical therapy. I had my first physical therapy session yesterday so I'll hopefully be back running the Gainesville sidewalks soon!

The second class I took at Mini Classes was Susan Carberry's 3-D Cupcake Cookie. What a fun class! Here's her display piece:


And here's mine:


Not too shabby, eh? This thing is actually a hollow cookie decorated with fondant! The top of the "cupcake" comes off and you can fill it with candy or another special surprise. Wouldn't this be the perfect keepsake for a 1st birthday party???

The last class I took was Kathy Scott's Petit Fours. She's hilarious so I usually spend the whole time laughing when I go to any of her classes or demos. To make petit fours, she cuts cake with different shaped cutters (hearts, hexagons, diamonds, etc). Kathy has created these great plastic molds in the same shapes. She coats the mold with white chocolate and lets it set. Then she places the cake in the mold and fills it with more white chocolate. After the chocolate has set again, you have a piece of cake surrounded by white chocolate! Kathy has also developed some cute fondant molds in similar shapes so she can create little toppers for the petit fours. As a finishing touch, she airbrushed them with a little pearl color. Gorgeous, huh?

While I was taking all of my classes, my friends Mikkel and Julie (and a lot of other people, of course) were taking day-long courses with Nicholas Lodge. He's one of the most respected people making gum paste flowers in the business today. Why didn't I take the classes from him too? There was just too much other stuff I wanted to learn! I have a couple of Nicholas Lodge's books and a DVD so I'll learn from those for now. Here's a photo of Mikkel, Nicholas' assistant Scott Ewing, me, Nicholas Lodge, and Julie:


If you want to see what they learned in class, check out Julie's blog. Gorgeous, life-like flowers!

Stay tuned...if I'm motivated enough, perhaps I'll demonstrate some of the things I learned at Mini Classes for you all.